Showing posts with label decor. Show all posts

Wednesday, September 16, 2015

our color story

valspar paint colors: new penny / woodlawn colonial / midnight bayou / sweet currant
shop: peacock pillow / lantern / marquee / starburst mirror


One of my favorite blog posts that I came across this summer was over at A Beautiful Mess, and it was about choosing a color story for your home. While you may feel a little bit hippy saying "my color story" out loud, I've always found that feeling a little bit hippy at times can be good for the soul. And for the humor. Besides that, creating a color story really has been a fantastic way for us to plan ahead and dream about our home together. 

My husband and I have vastly different decorating styles. I'm not sure he really has a style, per se, but he likes anything that's of good quality - which to him generally means it's made out of dark wood. I feel a manic desire to paint anything that's wood, so we're already starting off on a rocky ledge of conflict. That's where the color story comes in! This summer we spent a day date browsing the paint aisle at Lowe's and choosing our favorite colors. We then put them all together, narrowing them down until we had a handful of colors that we felt represented our vision.

Now, when we're shopping or painting or trying to make various choices for our home, we have this color story in the back of our minds. It's not to limit ourselves, but to focus our decision-making and design. As far as decorating goes, I like to color outside the lines. Having a color story that we were both involved in creating helps me to recognize and appreciate Dusty's input and to bring him into the process of my mind a little bit. It also gives me a reason to say, "look at all this dark wood! Now let's bring the rest of our color story in here...by painting that table...or that chair..."

As I was putting together the little color story collage above, I was realizing how incredibly different it is from anything I'd have previously imagined. Figuring out the color and feel of our home has been such an innovative process. It looks pretty cozy, yeah? I can't wait to see how it all comes together!

Saturday, April 25, 2015

a house to a home


I have a very important announcement to make:

WE GOT THE HOUSE.

The house hunting emotions are over. The Bank finally conceded, although I'm not going to say they were civil about it. (I told Dusty I nicknamed The Bank bastardions, because they're illegitimate and make me cry.)

My head has been swimming since we found out the news, mostly with the crazy projects I can't wait to get started on. This house needs a lot of tender love and care - as well as ruthless ripping up of carpets and violent scrubbing of absolutely everything. Spare the rod, spoil the child. Maybe that doesn't really apply here.

The point is, this is a great big [potentially] beautiful house just waiting to be Caitlined. I've had a secret Pinterest board I've been adding to over the last few weeks in the hopes that we would win the house war, and now that the dust is settling and the other offers are tending to their wounded, we can raise our victory flag and start buying clay to make CAT COASTERS.

cat coaster DIY via ABM


I know that expectations hardly ever meet up with reality, but I can't help but dream about the crazy eccentricities this house is going to feature. This house will be a work-in-progress for several years, but the prospect of constantly innovating and creating new touches to transform a house to a home is incredibly exciting to me. 

We'll build a good home, with lots of scope for the imagination. 
- Gilbert Blythe

Having a husband means I probably can't paint a giant gold moon on my wall like I'm really dying to, but maybe he'll let me sketch some tasteful constellations instead. But that's why I need him. We'll come up with ideas and compromises together, so our home can avoid looking like The Yellow Submarine (no but really, who wouldn't want to live in that house!?) and instead look more like a place that adult humans live. Ones that are socially capable of inviting friends over. 

I want to know how many ways you can use twinkle lights. I want cheesy things like a hutch to hold our coffee mugs and a big shiny sign that says "Cheers!" and an entire room dedicated to being a jungle gym for our cats. Don't tell me that wouldn't be hilarious. (Our cats could also really use the exercise). 

Before too long, we'll be swimming in carpet samples and tile ideas and paint swatches. We'll be donning hazmat suits while we attempt to douse the bathrooms in bleach. We'll be wearing shoes all day err day because that carpet ain't touching my bare feet. It'll be gross and magical and we'll be able to say "one small step for us, one GIANT step for sanitation!" when things are finished and beautified. 

I can't wait to give you a tour of the new house when the time comes, and to let you in on our little secrets of turning that house into our home. 


Thursday, April 16, 2015

april wishlist


I've been having some major wishlist itches this week. I've long admired these adorable matchboxes that feature various book covers on them, and recently I've been hoping this sweater from Ruche goes on sale - I love the orange "you are the apple of my eye" with the matching stripes on the sleeves.

If you've never seen Love And Other Disasters, it's seriously a very underrated Brittany Murphy movie. I always loved her and I'm eager to add this one to my collection. It's quirky and funny and sweet. The "Cuss Yeah" necklace is especially endearing for any Fantastic Mr. Fox fan, which I certainly am.

Probably the biggest and most earnest wishlist item is the special edition Harry Potter series book set. This set came out in 2013, and while it's currently unavailable, I'm dying to have it. The art is just beautiful. Take a look at the set on Amazon, which includes photos of every book. They're completely magical. Sigh.

What's on your wishlist lately?

Friday, April 19, 2013

diy: book garland


I've found that I have begun to enter into a new stage of life, where weddings and bridal showers are few and far between, and little ones dominate the scene.
It's an incredibly exciting time, one filled with fairytales and sweets and parenthood tips, joyful laughter and cute pictures and jubilant firsts. 
While I still feel caught in the middle, somewhere between newlywed and baby bump, I can still fully appreciate both sides of the spectrum.

This past weekend we threw a baby shower for a really close friend of mine who is having her first baby girl!
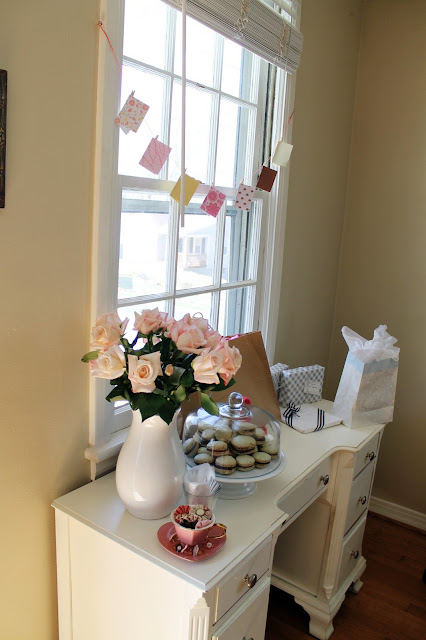
One of my favorite things that I got to make is a little storybook garland.
It turned out so cute, and was incredibly simple and cost effective.


Fashion and decor really do go hand in hand.
I find that the expressions of home and personal style often coincide, as they are both manifestations of personality and individual taste. 
You really get a feel for a person when you enter into their home, just as you do by seeing how they dress and how they carry themselves. It's all wrapped into the network of style.


I love theme parties and showers, because you can take one specific idea or style and run with it!
This particular shower was girly, chic, and whimsical. Very bubbly!

For the book garland, all you'll need are:

1. Cute scrapbook paper, in the color scheme of your choice
2. Book pages (I printed out mini excerpts from Peter Pan)
3. Stapler
4. String/Yarn/Twine
5. Mini clothespins (can be found at Michael's!)

I found a page excerpt from Peter Pan from Google Images, and simply printed that 16 per page, so they were already the perfect size and ready to cut!
You could also use any old children's book (perhaps thrifted) or book pages and cut them to the desired size.

1. Cut two rectangles from your text, and fold each of them in half, to make four book pages. Then place them on top of one another, text-side up!
2. Cut out a rectangle from your scrapbook paper, just a tad bigger than your text. Fold it in half, then open it back up and place the four text pages inside, text-side up.


3. Close the book and staple the back twice (make sure the pages are up against the spine of the "book cover"). 


Voila!

Do as many mini storybooks as you desire, and hang them on a bright colored string or yarn with mini clothespins for the finished product.

I pinned them in the middle so they'd be open, and once they were hanging I went through and stretched them backward a bit to make sure they stayed open, and that the pages were splayed. 

They turned out so cute!
Easy peasy, inexpensive, and oh so darling.